 eins' blog entry
how to rig hair in blender (without avastar) for secondlife: instructions from an idiot
posted: november 08 2024
last updated: november 08 2024
tired of the lack of anime hair choices, and trying to rig hair but have no idea how? can't afford to buy avastar, and can't find any rigging tutorials without it?
do you also have NO idea what you're doing on blender, like me?
well this is (probably) the tutorial for you!
i delved headfirst into trying to figure out how to rig hair in blender, and it was a lot of trial and error (and struggling with finding tutorials that i understand) that i think i never want anyone else to experience. so i'm sharing my knowledge here...
big disclaimer: like the title says, i am an idiot. i barely know how to use blender and i tend to "wing it" on a lot of things until they at least kind of look good. my tutorial might not be perfect, and may have errors or incorrect information.
also, i have no idea how to make your hair be connected to your boob physics, even though i do rig them to the pectoral bones in this tutorial. they will resize with your boobs in your avatar shape, at least, so that there should be minimal-to-no clipping.
sorry in advance!!
step one, you'll want to download a secondlife skeleton. specifically that. i highly recommend you download it directly from the secondlife wiki.
you can find that here under "Download Links."
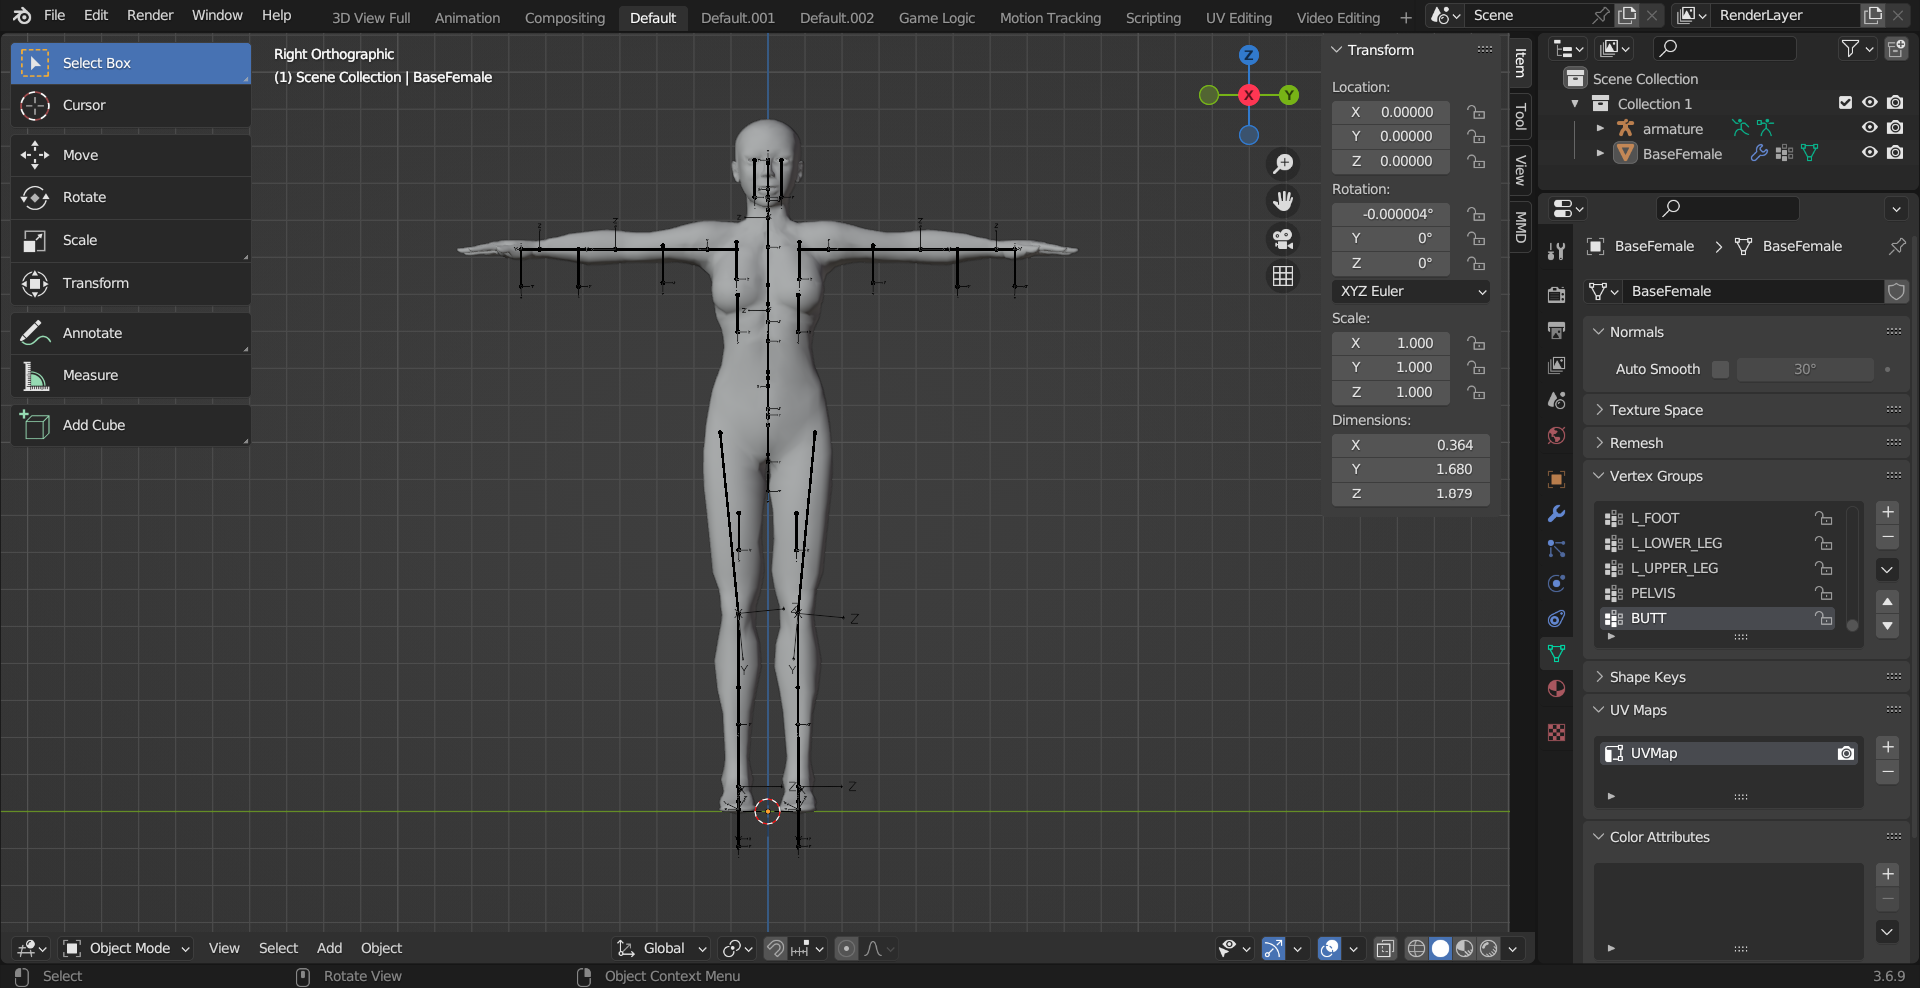
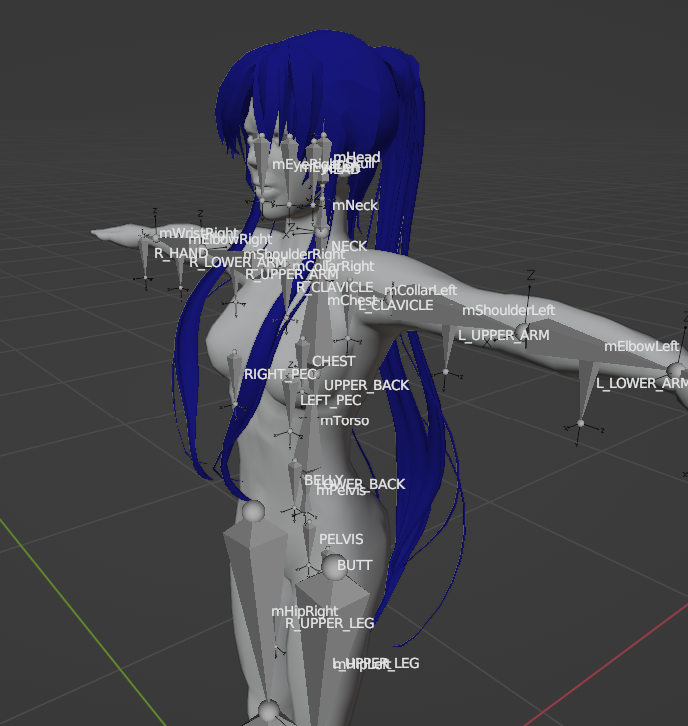
once you've got that downloaded, go ahead and open it in blender. it should look something like this.
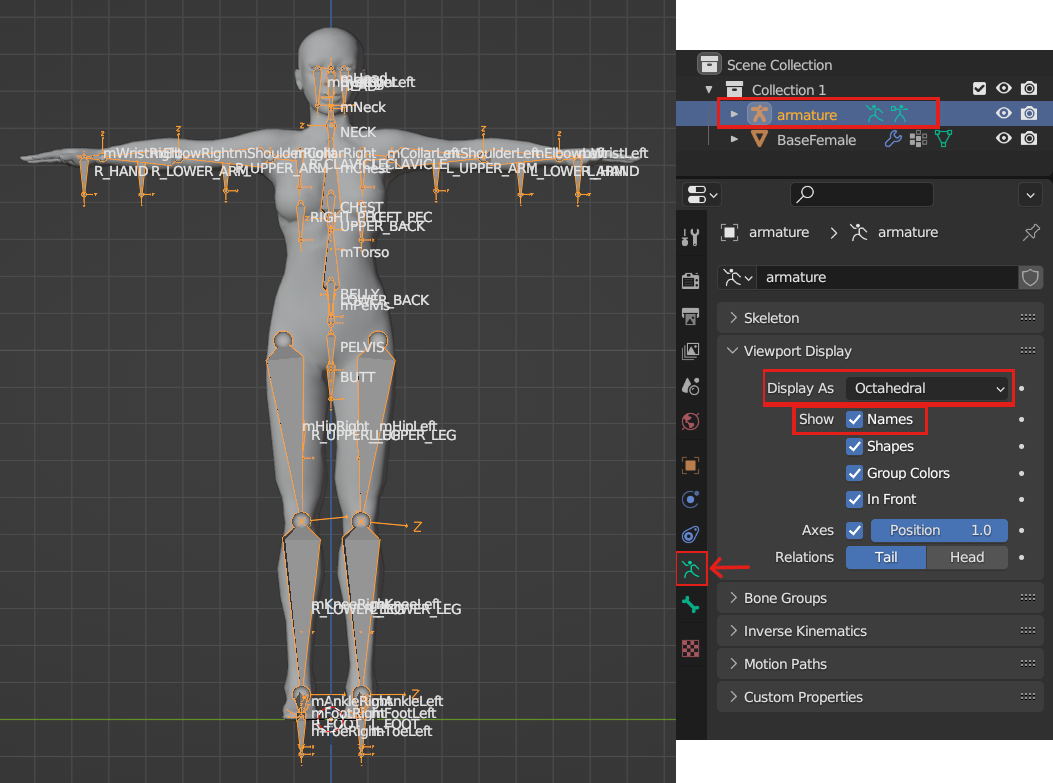
this step is optional, but it makes it a little easier for me to see which bones are where: select your "armature" at the side. then, in the "data" tab (the little running green guy), go under "viewport display."
set "display as" to "octahedral," and then make sure you have "names" checked in the "show" section.
again, optional! but might make the bones easier to see.
great!
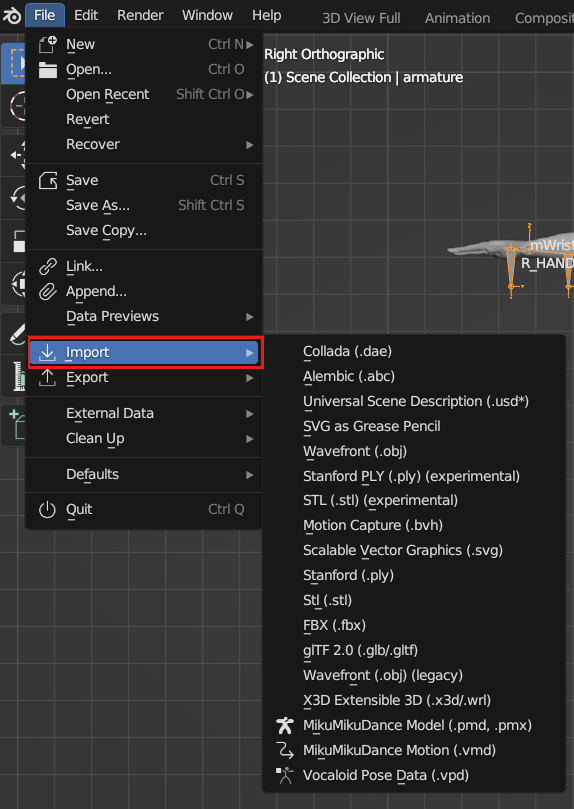
now that you've got that set up, go ahead and import your hair file. import, not "open."
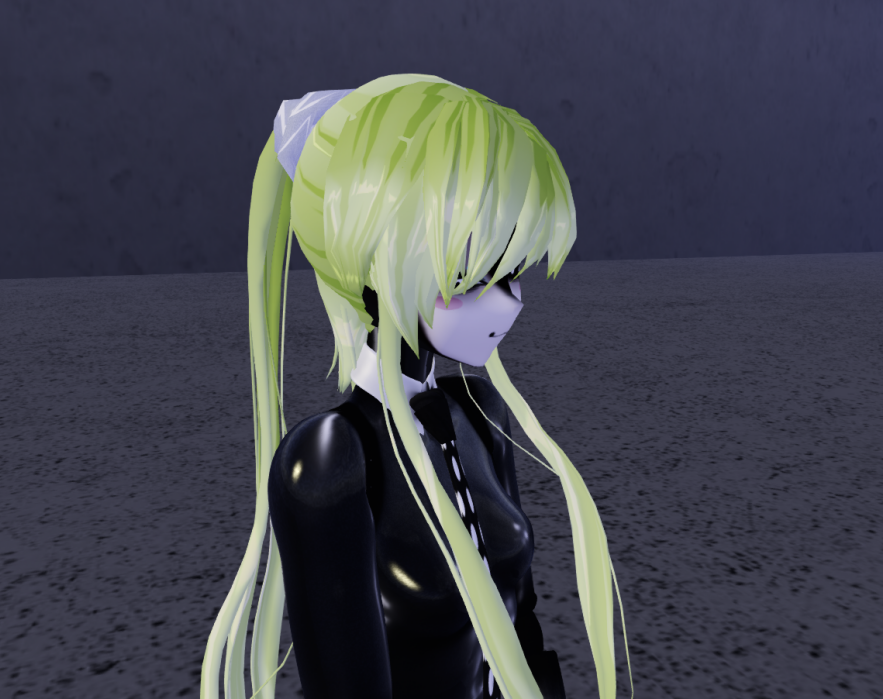
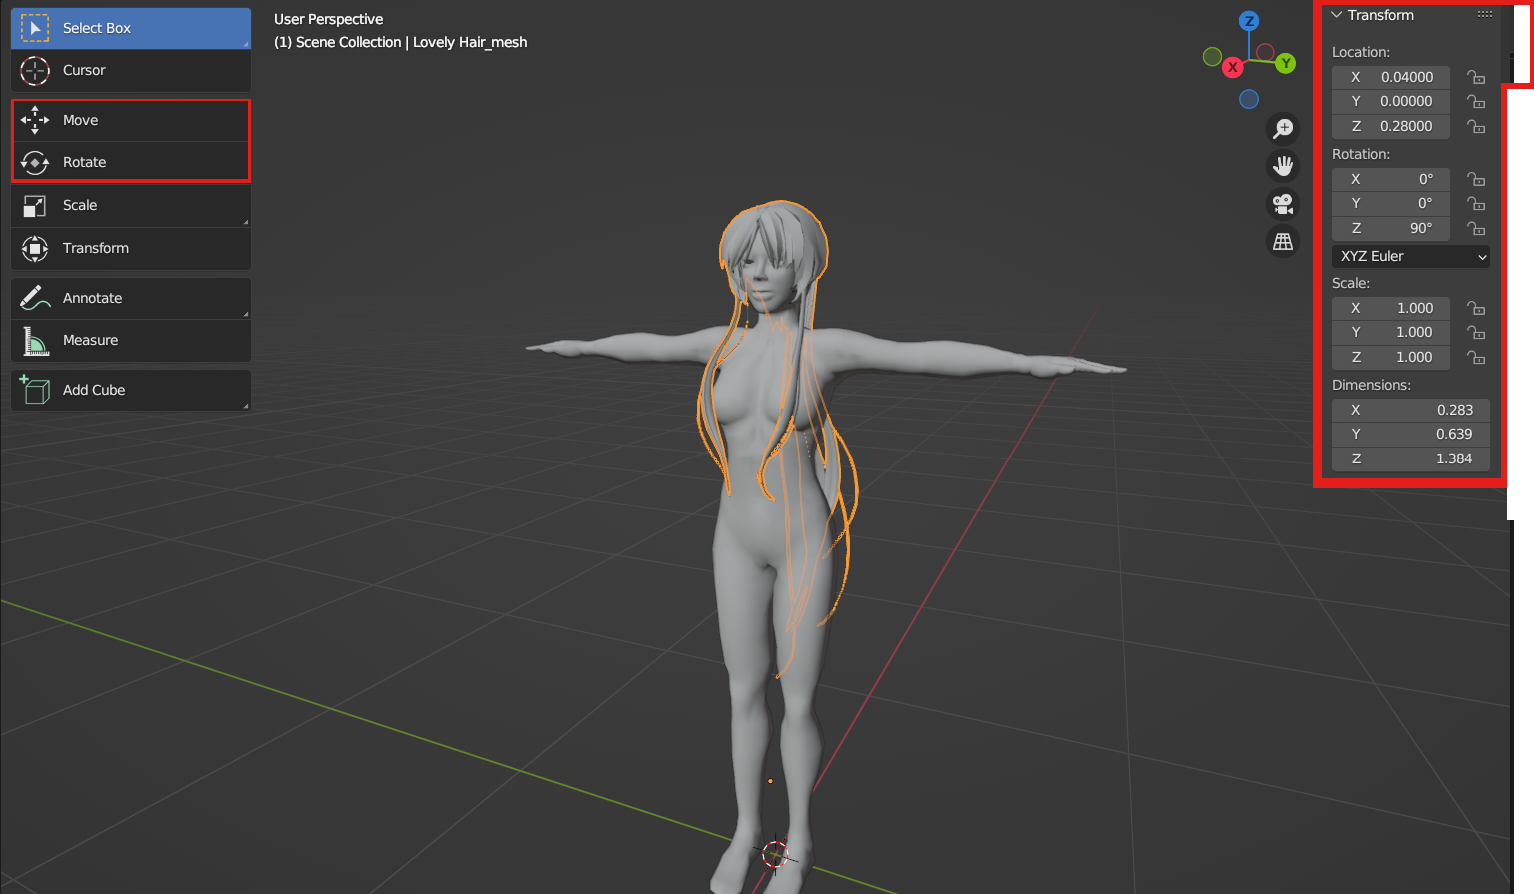
now that you've got the hair in there, it will probably be out of place. position it nicely with the base body.
generally, for anime hairs, i tend to put them maybe a teeny bit more forward than you would with a realistic hair. this is just because anime heads tend to be more spherical than realistic heads.
just make sure your hair, and only your hair is selected, and you can go ahead and use the tools highlighted on the left to move it around, or you can use that other menu on the right side. (it got cut off, sorry! but it's in the "item" tab i believe!)
(note: fitting your hair might be a little bit of trial and error! don't be scared to try and test it a few times, secondlife has "local mesh" for a reason! by the way, if you want to know how to use local mesh to test your rigged mesh, you can find my tutorial for that here.)
when you've got your hair positioned where you want it, it's time to actually connect it to the secondlife rig.
let's connect it to the armature (the bones) first.
select your hair first, then hold CTRL, and then select the armature second. make sure you select it in this order.
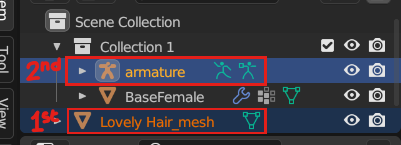
when you have it selected correctly, press CTRL+P.
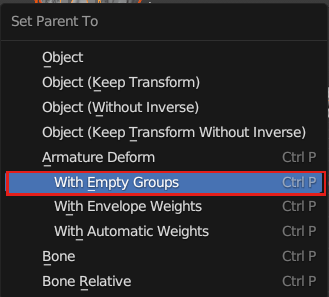
a little menu like this will show up. click "with empty groups."
now we want to connect the weights. don't ask me how this makes the rig work, i have no idea. it just does. (lol)
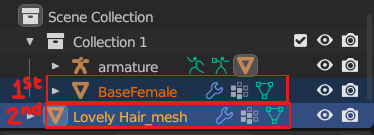
select the base body first, then hold CTRL and select your hair second. again, make sure you select it in this order.
then go down to the mode (this is in the bottom left of the screen for me), and set it to "weight paint."
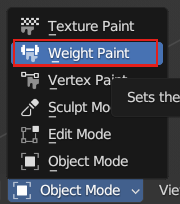
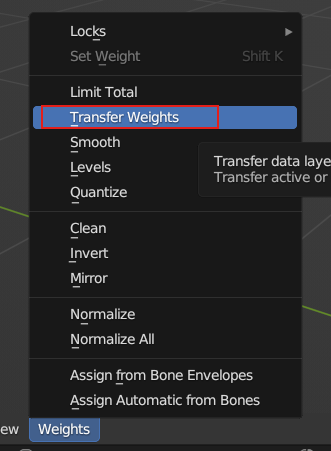
once you're there, there should be another dropdown menu near that called "weights."
with your hair and the base body still selected (in the specific order i taught you!!), click "transfer weights."
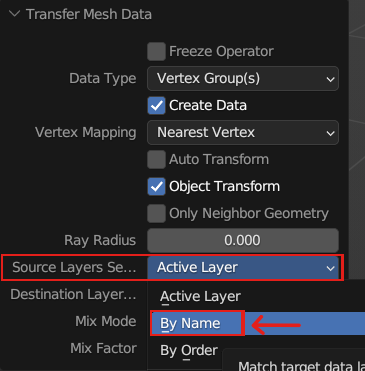
after clicking that, a little popup should appear that looks like this. click it.

it should open with a bunch of these settings. all we're gonna do here is go down to "source layers," and then set it to "by name."
now it's all connected! here's where it might get a little... tricky or confusing, especially if you decide to experiment with this part.
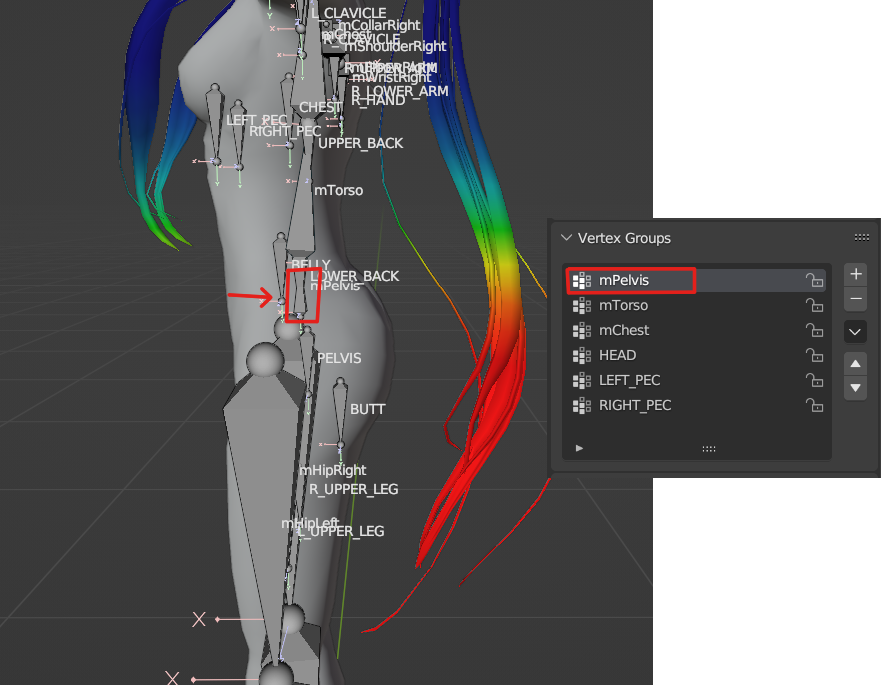
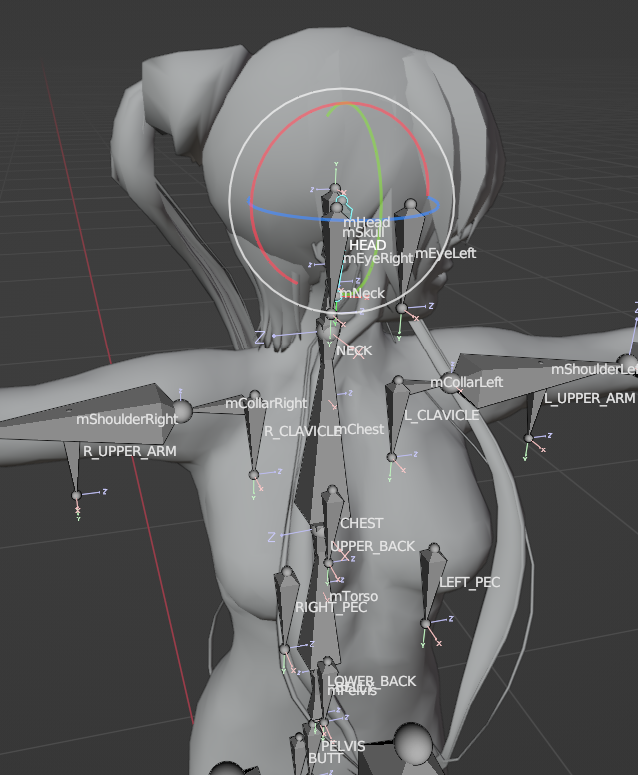
select your hair in the side menu. in the "data" tab (the green triangle this time), go under "vertex groups." you'll see this big list of all the bones your hair is now rigged to.
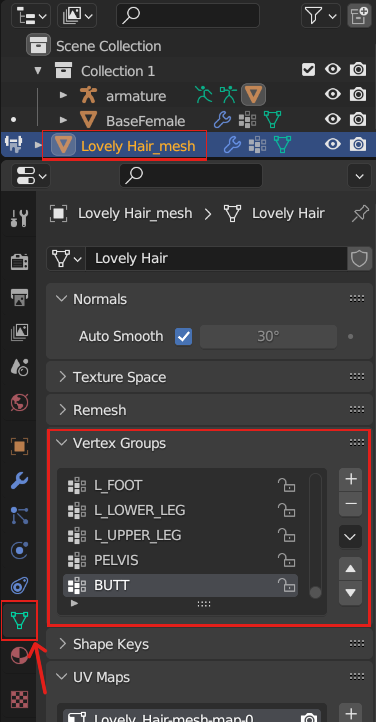
you don't need all those bones. in fact, for hair, in most cases, you should not have it rigged to all of those bones.
you just want a few bones along the spine for this. i usually choose "HEAD," "mChest," "mTorso," and "mPelvis" for hair that is this long.
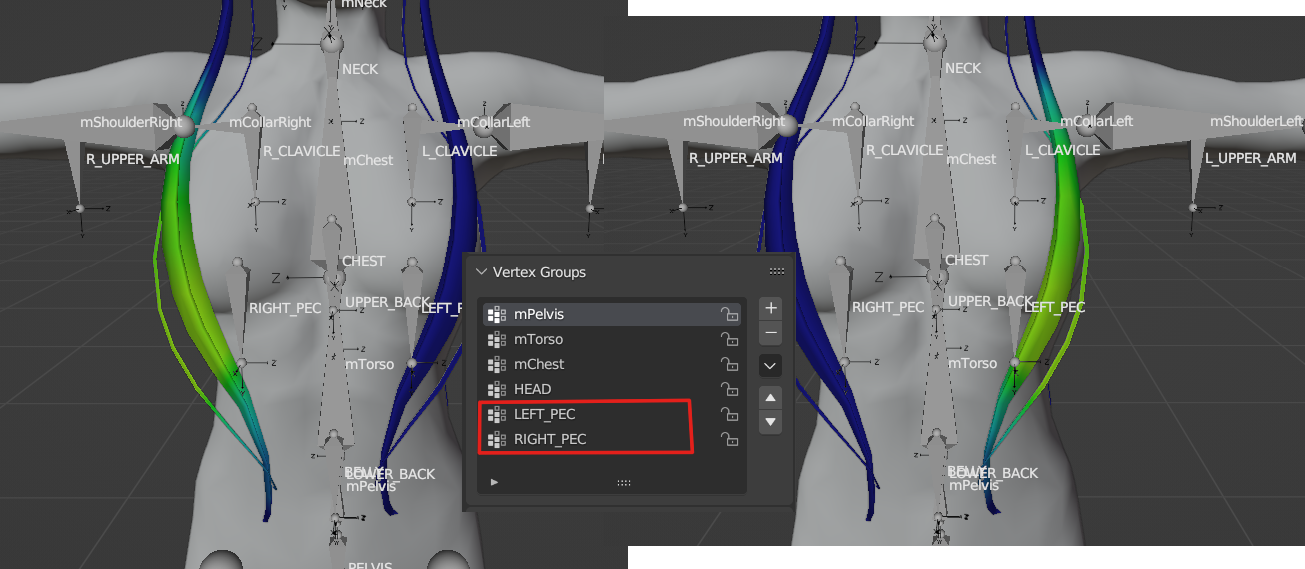
also, since this hair has long side pieces in the front, i have also kept the "LEFT_PEC" and "RIGHT_PEC" bones.
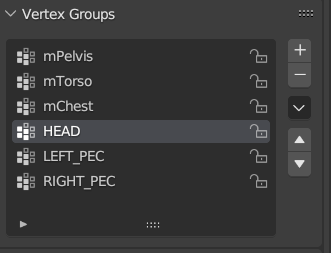
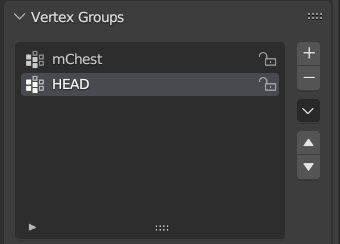
for hair that is shorter, you'd have less bones. the minimum is "HEAD" and "mChest."
also, of course, if your hair doesn't have long side pieces in the front, you won't need to keep "LEFT_PEC" or "RIGHT_PEC" either.
but for today, since we're rigging with very long hair, we'll have the longer list of bones i showed above.
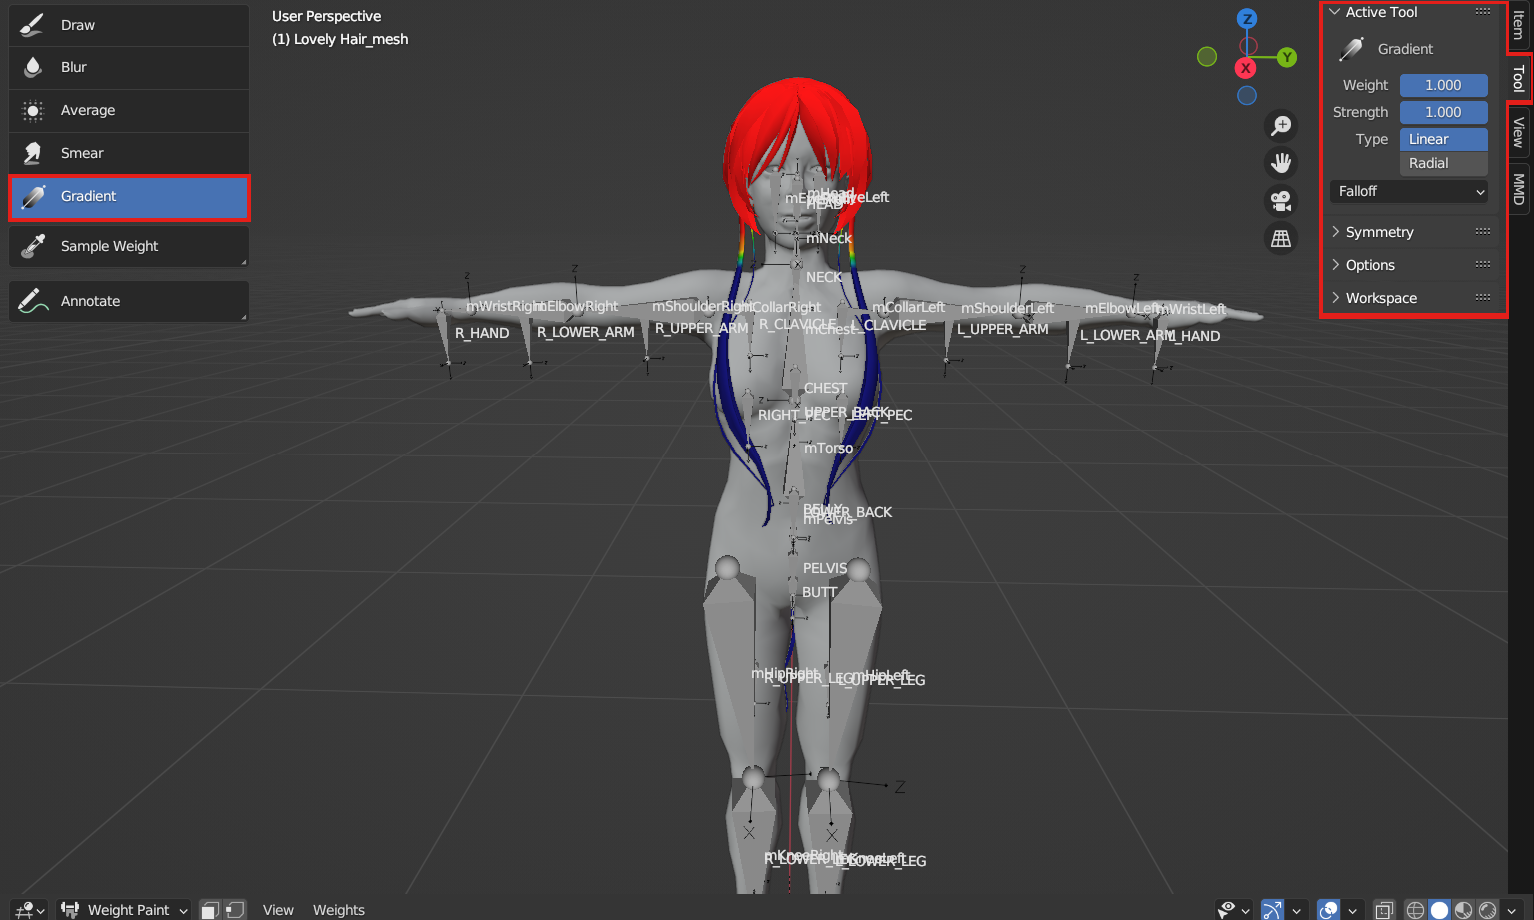
let's weight paint now! this is a very important step; it's basically what makes your hair "rigged" and bending with your body in the first place.
it's also probably going to get quite tedious, so buckle in!
we will be using the "gradient" tool. you can technically use other tools, but in my experience, they don't really reach all the faces of the hair. it's easier to use the gradient tool, as it reaches in all the nooks and crannies.
what we're going to want to do is "erase" all of the weight painting on all of the bones. (each bone/"vertex group" connected to your hair has individual weight painting!)
to "erase," set the "weight" for your gradient tool to 0.
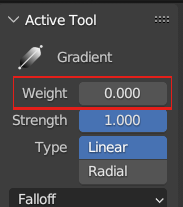
now use that tool on the hair all over, until it's all dark blue like this.
you will want to do this with every "vertex group," by selecting one, erasing the weights, then selecting a different one, then erasing the weights on that one, and so on, until they're all a clean slate like this.
now we can get to the weight painting part. set your gradient tool's weight to 1.
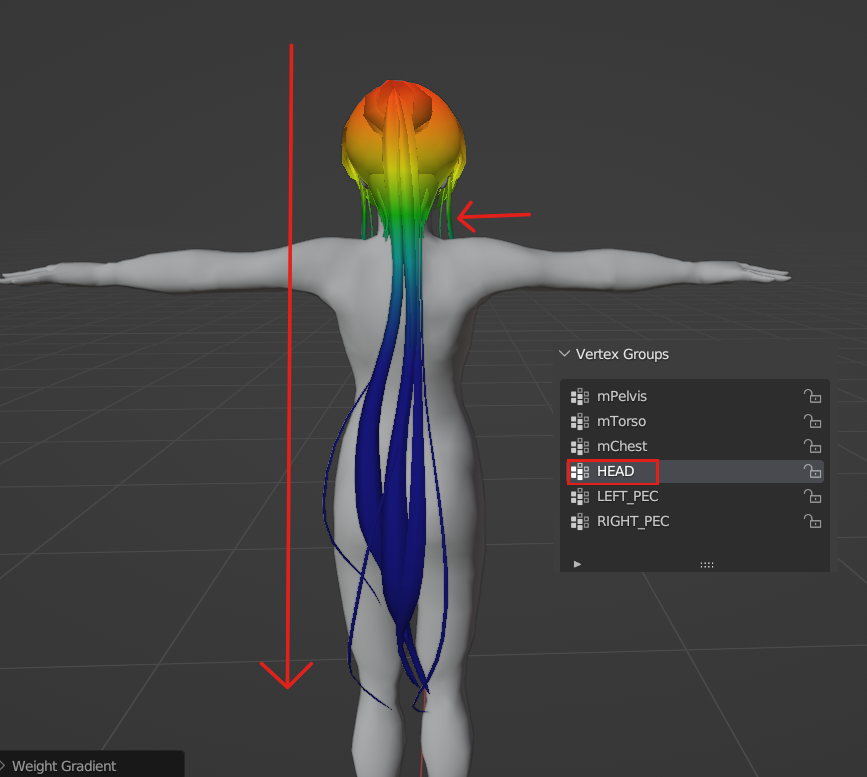
then select the "HEAD" vertex group on the side.
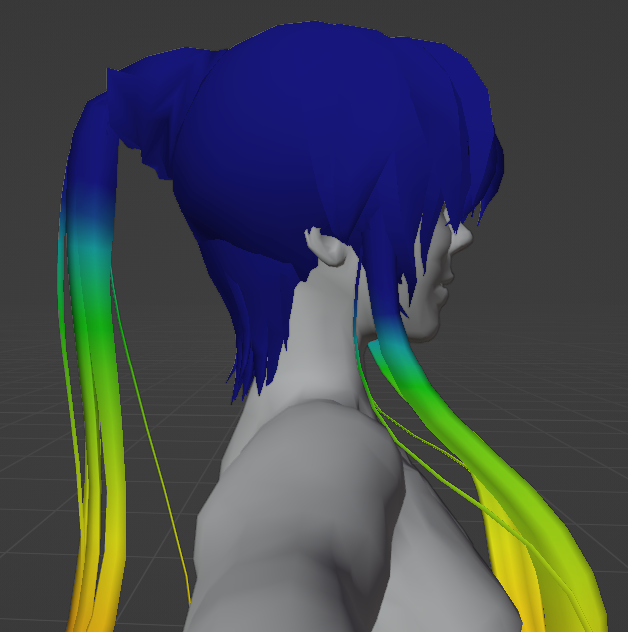
then you want to gradient in a straight, vertical line, from top to bottom, until the green part is around the neck, like so:
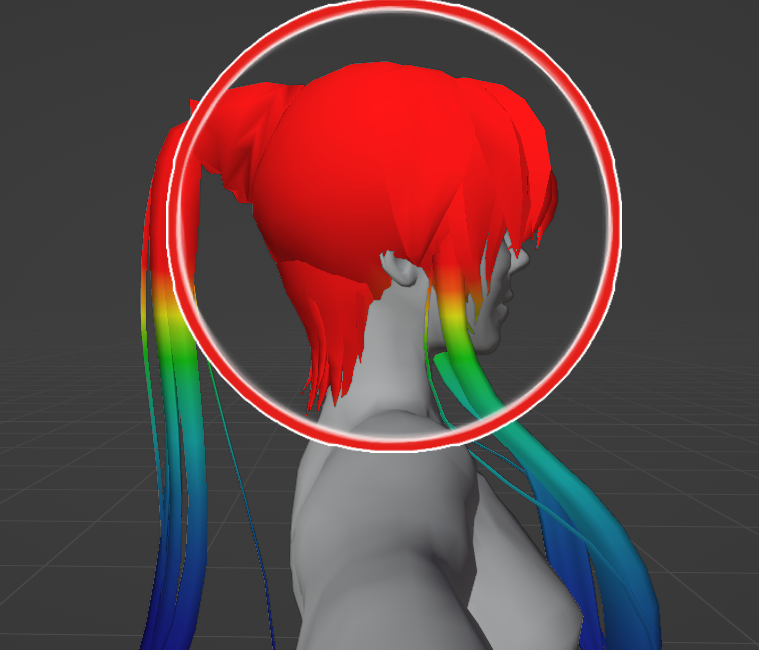
now we want to clean it up a bit. this is important. if you skip this step, there will be clipping where you don't want it.
you'll want to use your gradient tool in smaller sections until this whole section of the hair, the part that's directly connected to the head, is red like this. this is so it doesn't clip with the head or bend in weird ways.
(note: you can switch between "linear" and "radial" to get smaller or bigger details. experiment with it!)
great job! now lets move on to the next vertex group, "mChest." go ahead and select it from your side menu.
for this one, it's similar, but you want to do it the opposite way. gradient it with the linear gradient in a long, vertical line, until the green is around the neck.
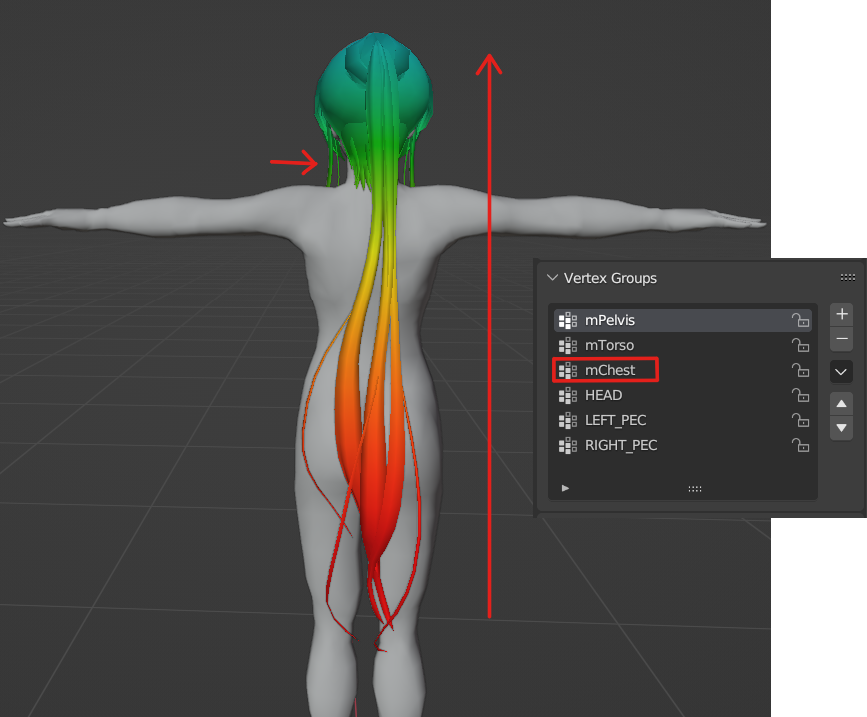
now, similarly to last time, you want to make sure the whole area directly connected to the head here is dark blue.
set your gradient tool's weight to 0, and start erasing until it looks clean.
(note: if you have your hair connected to "LEFT_PEC" and "RIGHT_PEC," you can probably leave those weights alone without having to erase them.)
we can move onto the next vertex group now, "mTorso."
you don't want to go all the way up to the neck with this one, you'll want to stop so the green is around the waist.
feel free to use your bones as a reference for where this should go.

cleanup wasn't needed for this vertex group for me since that part by the head is still all dark blue, but it might be necessary for you. feel free to experiment with it.
do something similar with "mPelvis," except, of course, make it so the green is around the hips.
again, no cleanup was needed for me there, but it might be for you.
as i said earlier, i just left the default weights on "LEFT_PEC" and "RIGHT_PEC." this is what they look like.
of course, you can mess with this if you dont like how it ends up moving, or if it seems like the weights are in the wrong place.
rigging is technically done now!
you can go ahead and test roughly how the hair bends and moves with your body by selecting the armature, and then going to "pose mode" in the bottom left.
you can use the rotate tool for this.
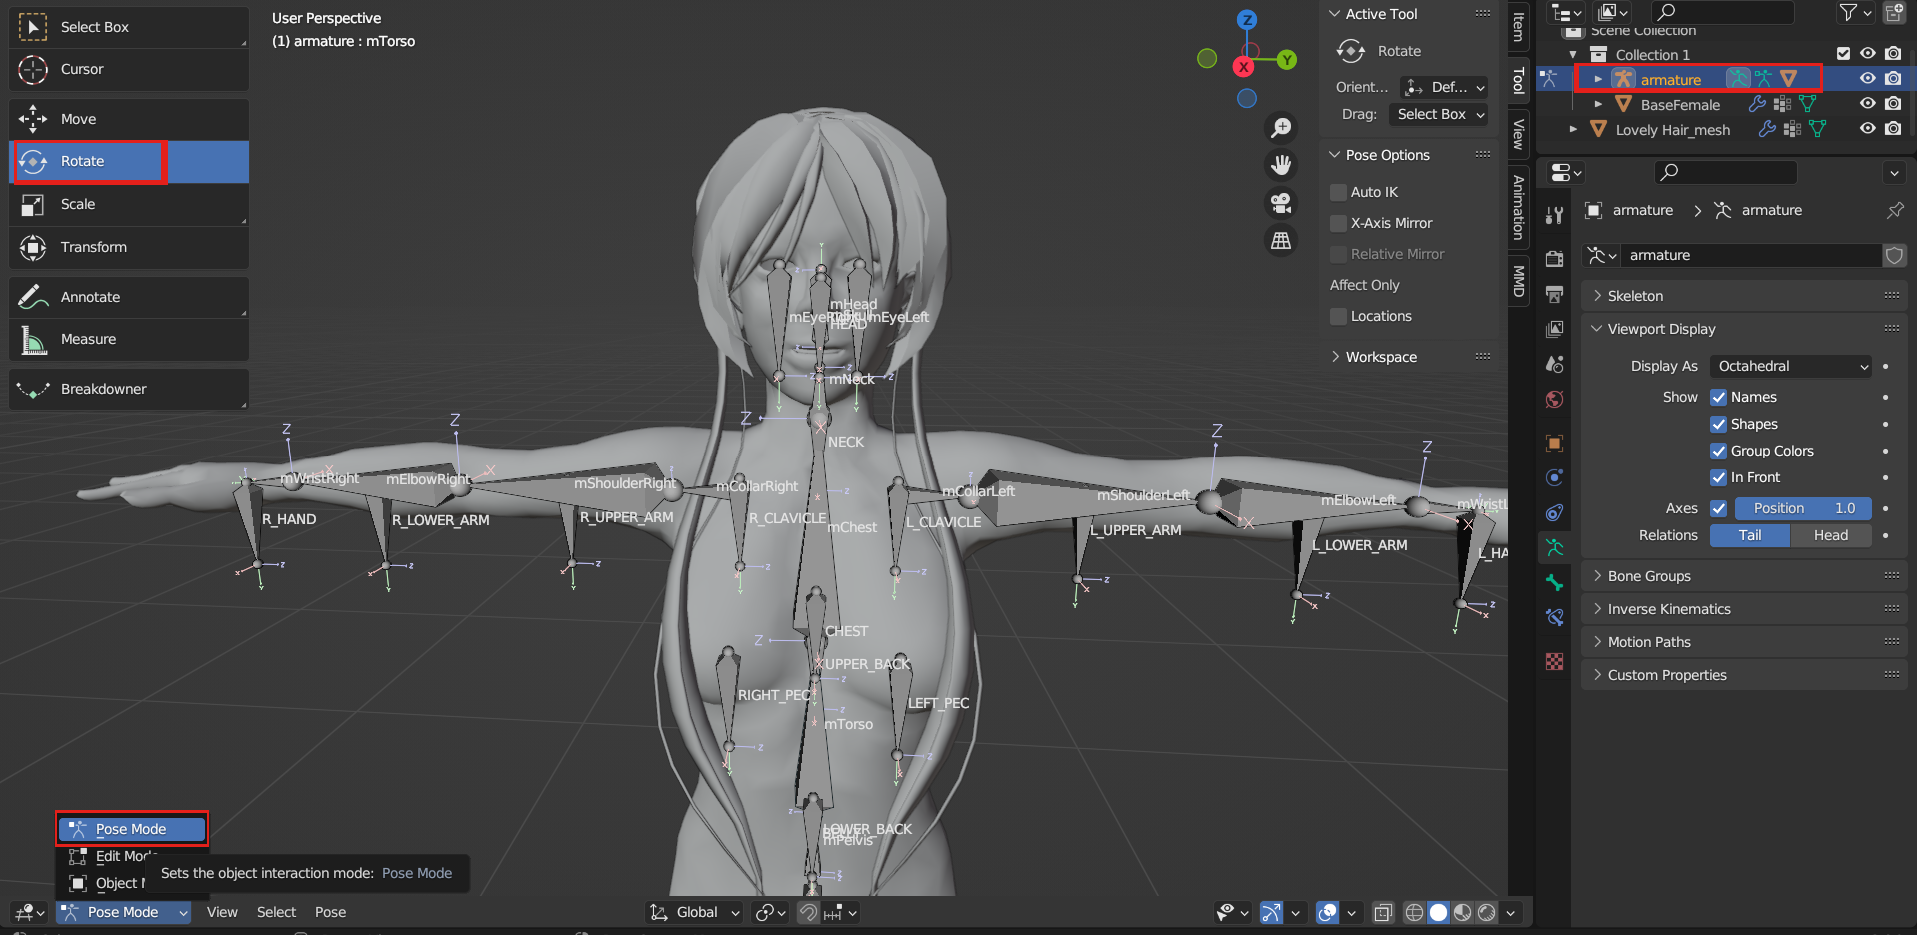
you can select bones (usually, the bones you rigged to the hair) and twist and turn them to see how the hair moves with the body.
feel free to make adjustments to the weights if necessary after testing this!
if you're all happy with that. it's time to export.
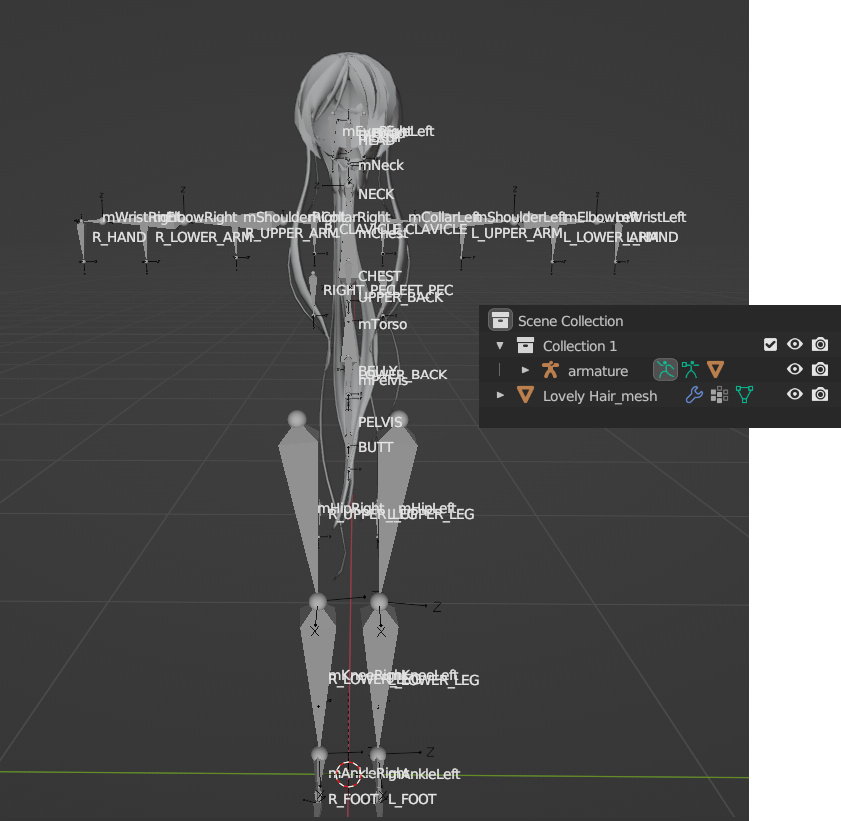
but before that, you're going to want to make sure to delete the base body.
select the base body (not the armature), then right-click, and click "delete hierarchy" to get rid of it all.

your scene should look like this now.
it's a little scary, if you ask me...
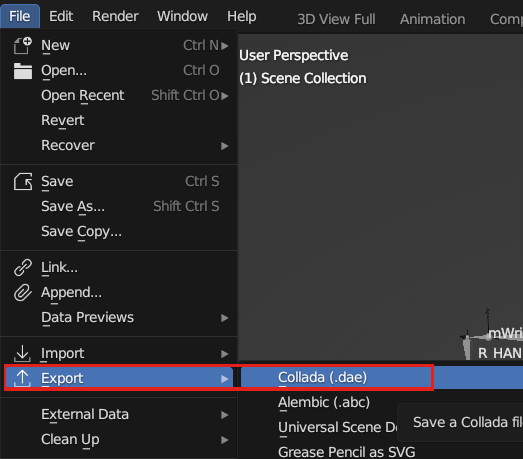
now you can export.
go ahead and go to the top left, and click file > export > collada (.dae)
once the export window opens, go ahead and name your file whatever you want. but don't save yet!
go to the side, and click the "extra" tab.
then, make sure "keep bind info" is checked.
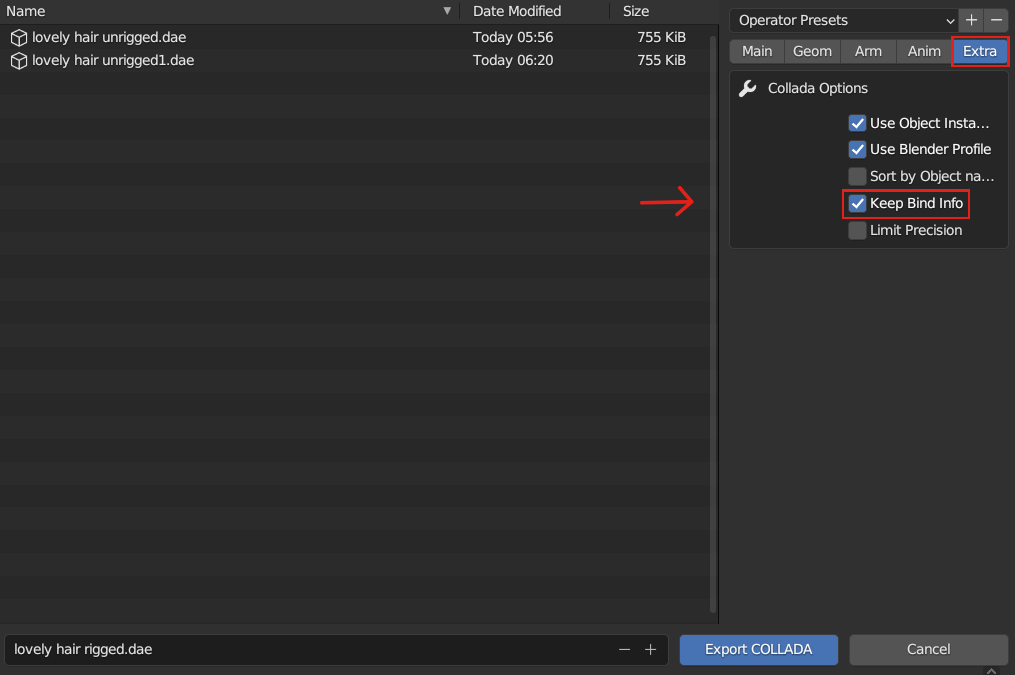
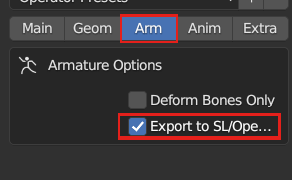
then click the "arm" tab.
then make sure "export to SL/opensim" is checked.
then you can finally go ahead and save the file!
now you're all done! you can import it into second life and it should be rigged.
happy rigging!